You can bring existing contacts into Uddom from a CSV file. The wizard checks the file, lets you map its columns, shows a preview, and asks you to confirm consent before anything is imported.
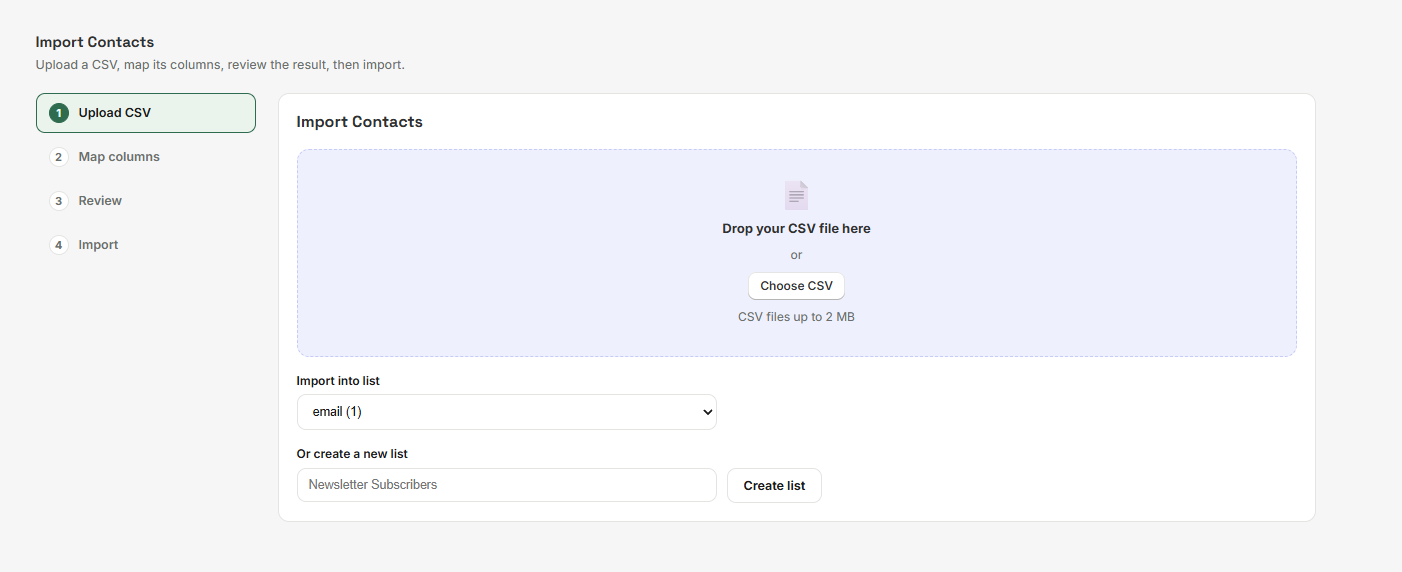 Import Contacts wizard
Step 1 — Upload CSV#
- From Email Lists, choose + Import CSV.
- Drag a file onto the drop area or choose Choose CSV. Files must be CSV, up to 2 MB.
- Choose the list to import into with Import into list, or use Or create a new list.
Step 2 — Map your columns#
For each column in your file, choose what it contains:
| Field | Required |
|---|---|
| Required. | |
| First name | Optional. |
| Last name | Optional. |
| Ignore this column | Skips a column you do not need. |
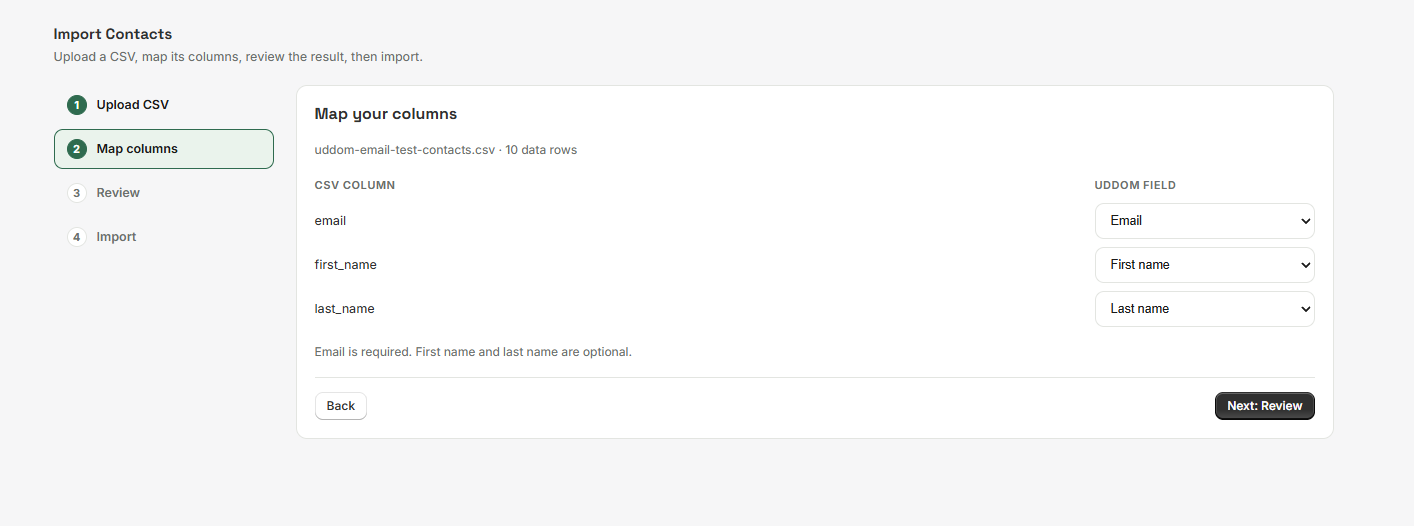 Map your columns
Step 3 — Review#
The preview shows how the file will import:
| Figure | What it tells you |
|---|---|
| Rows | Total rows found in the file. |
| Valid | Rows that can be imported. |
| Invalid | Rows that will be skipped (invalid records are not imported). |
| Duplicates | Contacts that already exist and will be updated rather than duplicated. |
| Empty rows | Blank rows ignored by the import. |
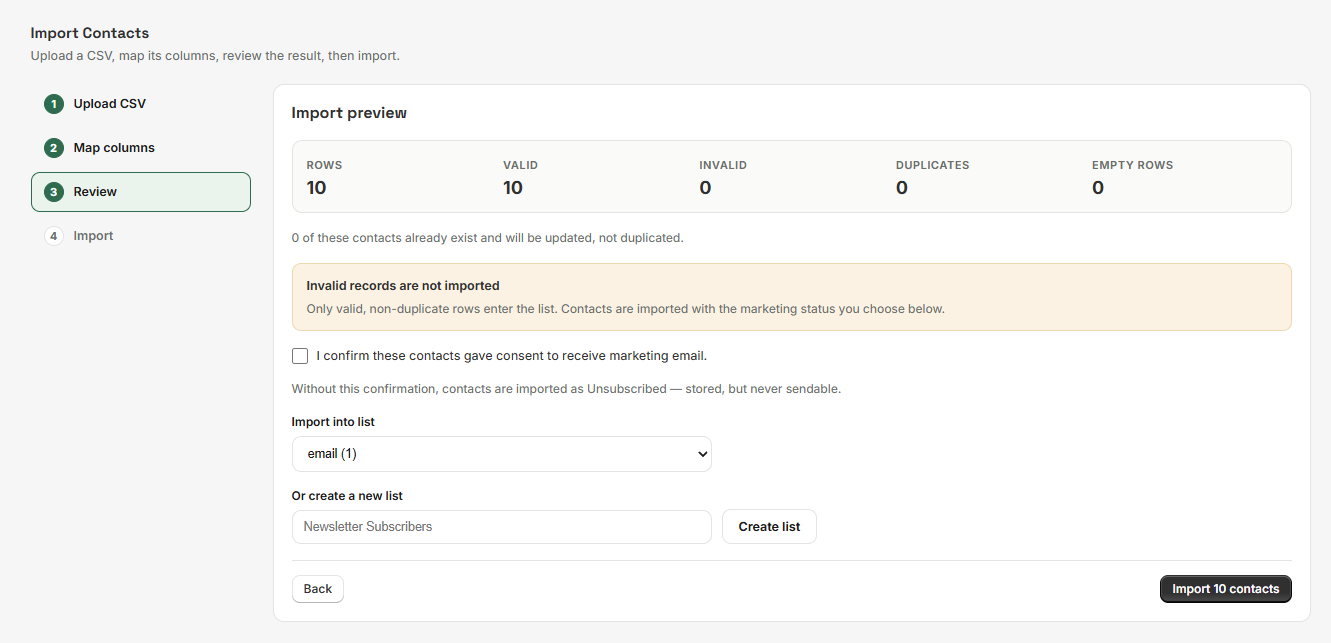 Import review
Confirm consent#
You must tick “I confirm these contacts gave consent to receive marketing email.” before the import can create sendable contacts.
| Consent ticked? | What happens |
|---|---|
| Yes | Contacts are imported as Subscribed and may receive bulk email. |
| No | Contacts are imported as Unsubscribed — stored, but never sendable. |
Step 4 — Import#
Choose Import N contacts. When it finishes, a summary shows Created, Already existed and Added to list. You can then go Back to List or to All lists.
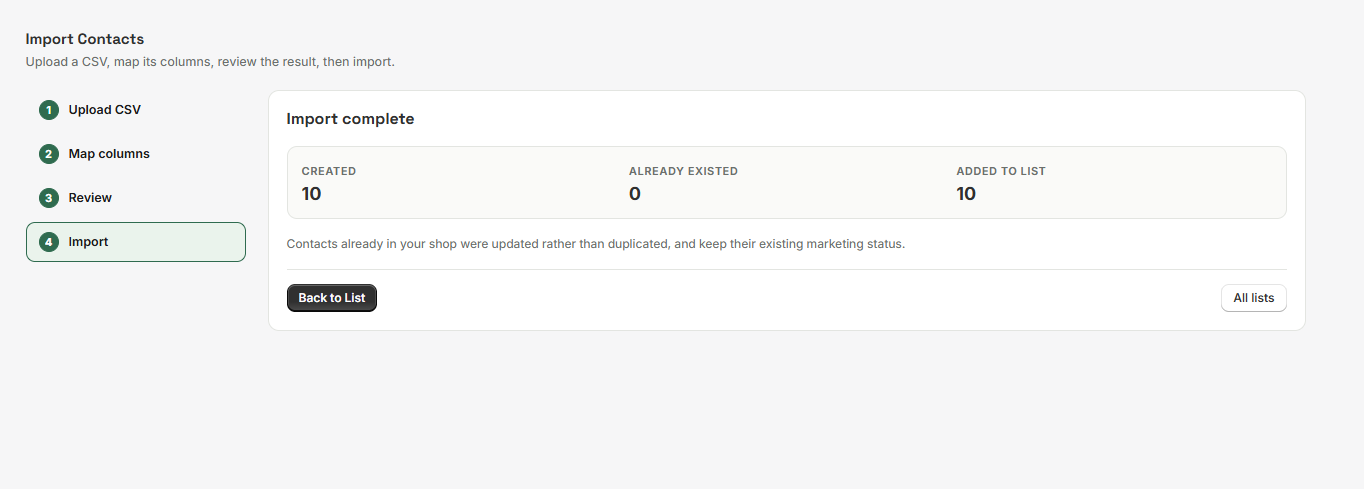 CSV import result: Import complete
Best practices#
- Only import contacts who genuinely agreed to hear from you — the consent confirmation is there for a reason.
- Map columns carefully; an unmapped email column will make every row invalid.
- Import in reasonably sized files so you can check the preview each time.
Troubleshooting#
- “That file is larger than the 2 MB import limit.” Split the file into smaller ones.
- Rows are marked invalid. Check the email column is mapped to Email and the addresses are valid.
- Contacts imported but cannot be sent to. They were imported without the consent confirmation, so their status is Unsubscribed. Mark them subscribed in the list once you have their consent.