The Guarantee banner is a single reassurance banner with your own wording, shown on your product pages. Like the Trust badge strip, nothing is added on your behalf — you write every word.
What it does#
You set a heading (required), an optional description, an optional image and an optional button with a link. Uddom shows the banner in the layout you choose.
Why use it#
A plain, honest guarantee — “30-day returns, no questions asked” — removes a common reason shoppers hesitate.
How to enable it#
- Open Growth → CRO and find Guarantee banner in the Trust group.
- Switch the toggle on.
- Choose Configure, pick a layout and write your wording.
- Save.
Configuration#
| Setting | What it does |
|---|---|
| Layout | Classic Guarantee, Centered Guarantee, Guarantee Card or Split Banner. Default: Classic Guarantee. |
| Image | Optional. PNG, JPG, WEBP, GIF, SVG or AVIF, up to 5 MB. You can also remove it. |
| Image alt text | Optional. Describes the image for assistive technology. |
| Heading | Required. The banner’s main line. |
| Description | Optional supporting line. |
| Button text | Optional. The button label. |
| Button link | Optional. An https address, such as your refund policy. |
Without a heading, the banner cannot show. Also, if you add a
button link it must start with https:// — Uddom will
not save an invalid link.
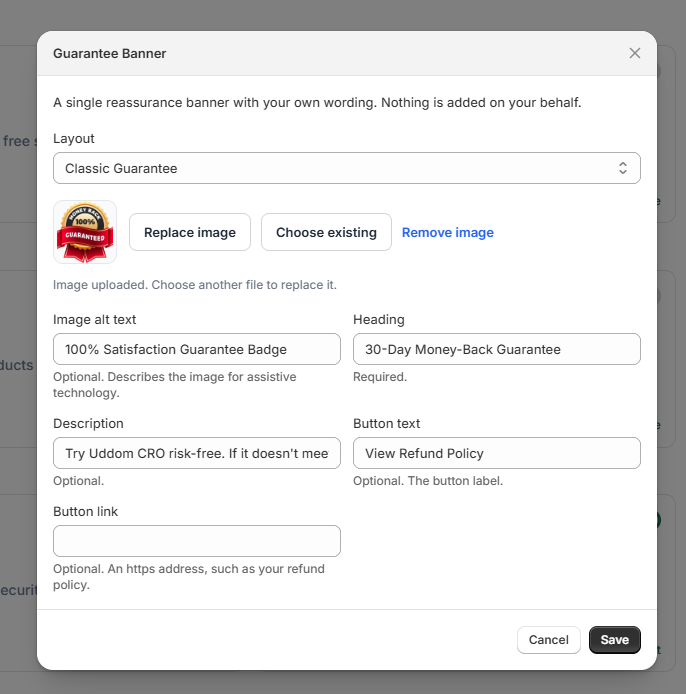 Guarantee banner settings
What customers see#
Shoppers see your heading, description and (if you added one) an image and a button that links to your chosen page.
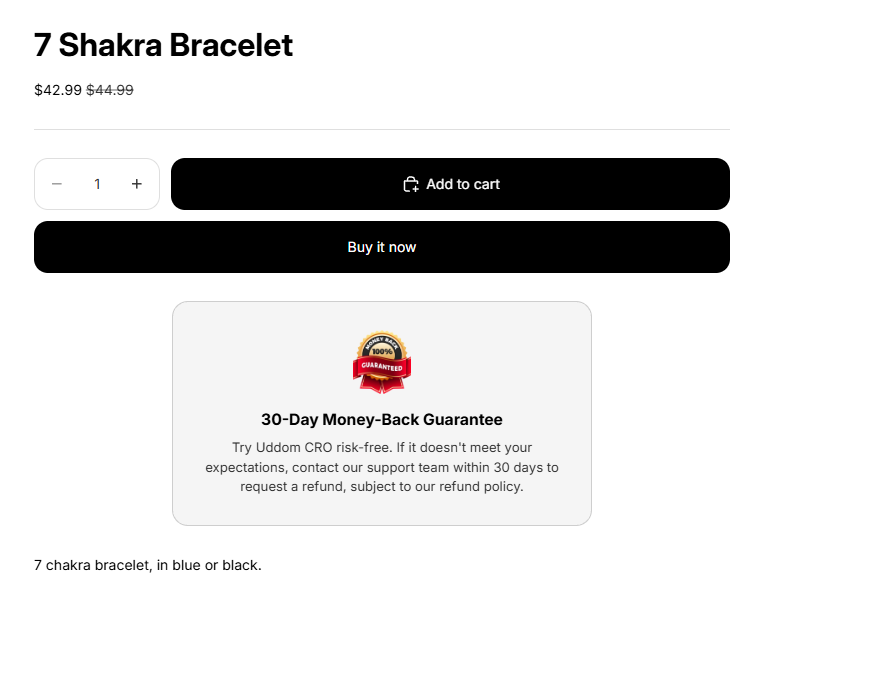 Storefront result: guarantee banner
Best practices#
- State the guarantee plainly — length of the return window and what it covers.
- Link the button to your real refund or returns policy.
- Keep the description to one or two short lines.
Troubleshooting#
- The banner does not show. Confirm you added a Heading, and that the app embed is enabled.
-
The button does nothing. Check the link starts with
https://.